Diy Styrofoam Cornice Boards
Place the foam board you just cut on a flat surface and put your curtain rod on top with the brackets facing up. 32 wide to 19 foot wide for home or office.

Easy and Light Cornice Boards From Foam Board Window
Next grab a remnant piece of foam board and place perpendicular on the short side.

Diy styrofoam cornice boards. Out my page on facebook for more transformations. See more ideas about cornice, cornice boards, window cornices. Lay down some batting first, then your fabric on top.
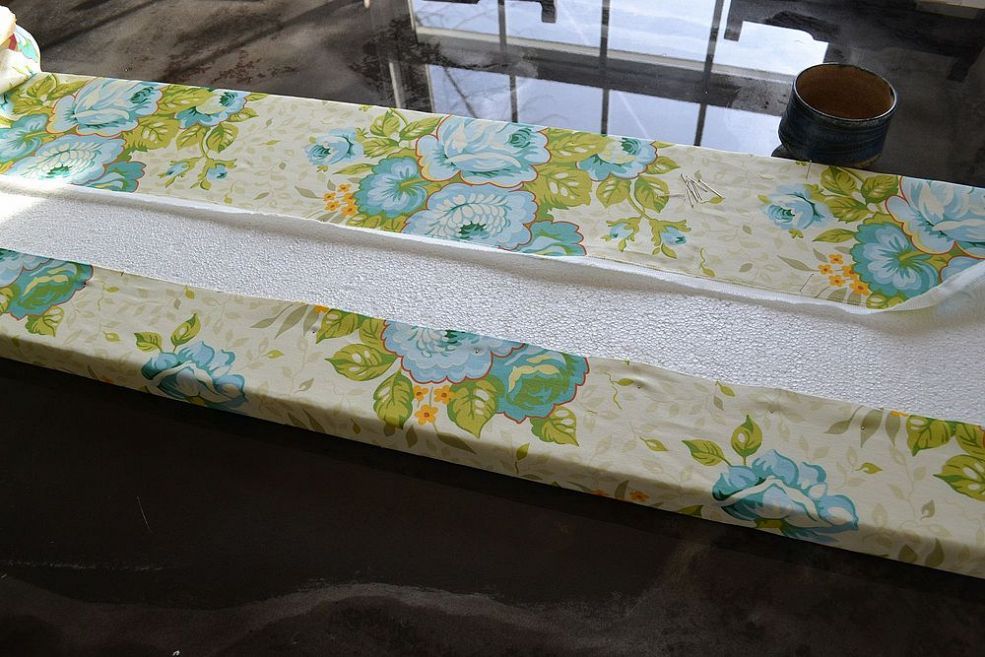
Wrap the other side, and pull tightly, ensuring that the fabric is straight and has no wrinkles on the front side. Cut your styrofoam panels the length and width of the cornice board. (while doing this take care that the batting was pulled at a consistent tension so it laid smooth on the front face.) 5.
Cut 2 wood blocks, 5″ x 3.5″ each (used for hanging the board) (i used lumber scraps for. Figure out the width that you want the cornice to be. Make a mark just below the edge of the curtain rod edge.
Diy styrofoam cornice kits instant decorating at it's best diy styrofoam cornice kits are easy to assemble, decorate and hang. So next time you order something with a large piece of styrofoam save it and make yourself a light easy to hang and easy to change the fabric cornice board :) ck. I roughly cut my fabric into 2 pieces and left extra on each, just to be sure i had enough.
Wrap and staple one side of the fabric on the interior corner of the cornice. Staple securely along the same interior edge. Make the corners of your cornice by carefully cutting in 6 inches on each side.
Cut and attach fabric glue staples duct tape. Creating a cornice for your window can be as simple or elaborate as you would like. Our no sew cornice kits are perfect for the diy'er and professional!
Fold and staple batting along the top edge. The 12 drop height avalon cornice kit works great in most rooms and with all ceiling heights. First, cut your batting to wrap around the entire board, with enough extra fabric to be able to pin your fabric in place.
I took the board from him and he made his marks for the first bracket. Then cut two smaller pieces for either side. With deco wrap there is no sewing.just wrap, tuck, hang.
Fold batting over and staple to the back of cornice board. Deco wrap is the original patented no sew cornice as seen on tv and qvc and sold at walmart, joann fabrics, hobby lobby, hancock fabrics and independent fabric stores but is now exclusively available on this site direct from the inventor, allowing us to be the most affordable foam cornice board on the market. Cut two more smaller pieces of the styrofoam panel for the sides of your cornice board.
Duct tape all the pieces together (if needed). Allow the excess to wrap over the back edge. Fold, trim, and staple sides and corners of.
First i measured my window to get an idea of what size the faux cornice would need to be. There are 6 styles for you to chose from and add a personal touch to your home without sewing. Don’t cut the whole way through!
I used a staple gun with 3/8″ staples to adhere all the fabric. To determine exact placement of the boards we hung the curtains, then held the boards up by hand to get the height right. Marty reached under with the 3″ bracket until it abutted the cornice board header.
This measurement will depend on how far you would like your cornice board to come out from the wall, i cut mine to be about 5 inches wide. Measure the width of the window from the outside edges of the trim and then add 4″ (2″ allowance per side.) cut front of board to desired length (window & trim width + 4″). Just assemble, decorate and hang these beautiful light weight cornices to beautify any room!
Foam was the perfect size for our kitchen window. Luckily, no one will see behind your board so you don’t have to worry about the backside. I found that pining the fabric in place worked best for.
I used an exacto knife and it cut like butter. Then hot glue the outer short edges of your long piece and press the shorter pieces to it like in the picture above! Cut out the length and width of foam board.
Here is my completed cornice for my kitchen window. Now, it’s time to cover it. As it would happen, the size of my make it fun!
The foam sheet i used was 36 7/8” by 12” x 1”. Once it was secured, he held the next bracket up and put a level on it.

Cornice Board Round Up and DIY Tutorial! Theyre EASY

DIY cornice board [using foam board+styrofoam] Cornice

Curtains & Styrofoam Cornice Boards (With images
DIY Cornice Boards For the House Pinterest


How to Make a NoSew Cornice Board Window valance diy

Creating a Beautiful Life Cornice from Foam Board Home

Cornice Board from Foam Insulation Board Foam insulation

How to Make a NoSew Cornice Board Cornice boards diy
Curtains & Styrofoam Cornice Boards Cornice boards

Easy and Light Cornice Boards From Foam Board Cornice

How to Make a NoSew Cornice Board Cornice boards diy

This tutorial on how to make a nosew styrofoam cornice

Make your own DIY window cornices out of foam core, fabric

Easy and Light Cornice Boards From Foam Board Window

DIY cornice boards Home, Home decor, Diy pillows

Cornice Board made out of Project Foam Board Covered in

The Cornice Store DoItYourself No Sewing Styrofoam

cornice board from foam core diy look for other

How to Make a NoSew Cornice Board Cornice boards diy
Post a Comment for "Diy Styrofoam Cornice Boards"